How to Sew Fabric Gift Bags: a Tutorial
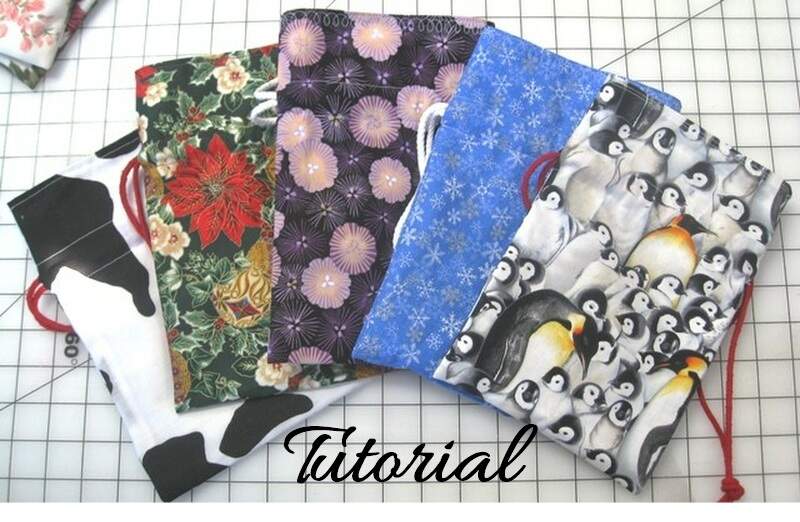
 Make your gift extra-special by wrapping it in one of these beautiful, reusable fabric bags. I’ve given gifts in these bags for years, and many times, the recipient likes the bag just as much as the gift inside! It’s like adding a little extra treat to your gift.
Use the instructions in this post to make lined drawstring bags in three sizes:
- Small (9-1/2″ x 6-1/2″ )
- Medium (11-1/2″ x 10-1/2″)
- Large (19″ x 15″)
Supply List for Fabric Gift Bags
Here are the supplies you’ll need:
- 1 piece of focus fabric for the outside of the bag. It’s easiest if you use a non-directional fabric that can be cut either vertically or horizontally. Cut the fabric 7″ x 20″ for a small bag, 11″ x 24″ for a medium bag, or 16″ x 40″ for a large bag.
- 1 piece of coordinating fabric for the bag lining. Cut the pieces of coordinating fabric the same size as the focus fabric.
- All-purpose thread in a matching color.
- Two pieces of decorative cording, wide grosgrain ribbon, or laundry cord. If you use ribbon, choose a thick one. Thin ribbons get tangled easily when tied into a bow. Cut each piece of cording to the following length: 30″ for a small bag, 35″ for a medium bag, or 45″ for a large bag.
- Sewing machine.
- Rotary cutter.
- Large see-through cutting ruler, ideally 6″ x 24″.
- Scissors.
- Seam ripper.
Step-by-Step Instructions
- Use the rotary cutter and ruler to cut a rectangle of the focus fabric a same-sized rectangle of the lining fabric.
- Fold the two rectangles in half with right sides together and the fold at the bottom, like this:
- Sew the side seams on each rectangle, using a ¼” seam allowance.This will make two fabric pockets.
- Turn the lining fabric pocket right side out. Leave the outer fabric pocket inside out.
- Stuff the lining pocket inside the outer pocket. Match the side seams and bottom corners. Both pockets should have their right sides together. Pin around the top edges if desired. (I don’t usually bother.)
- Sew around the top edge of the bag with a ¼” seam allowance. (This is a lot easier to do on a free-arm sewing machine, if you have one.) Leave a gap of about 3″. You will use this opening to to turn the bags right side out.
- Reach into the opening. Pull the lining fabric right side out through the opening, then pull the outer fabric through and turn both parts of the bag right side out. I use a chopstick to poke out the corners. This is the only tricky bit in making the bag. When you’re done, both bags should be right side out and attached at the middle, like this:
- Push the lining fabric down inside the outer fabric.Now the lining should be inside the outer bag with right side of the lining facing in and the right side of the outer bag facing out. Poke the corners of the lining into place with a chopstick or stiletto.
- Press the bag. Pay special attention to turning under and pressing the seam allowance in the unsewn area.
- Topstitch around the top seam of the bag, using a 1/4” seam allowance. Make sure the opening where you turned the bags is stitched closed. I often use a decorative stitch like the one shown in the photo below to secure the entire seam allowance area at the top of the bag and make sure I haven’t left any little gaps.
- Next you’ll make a drawstring casing. Stitch around the bag 2” from the top. I used 1″ blue painter’s tape to mark the 2″ spot on the bed of my sewing machine.
- Stitch a second seam around the bag 1 inch below the first seam. With the 1″ painter’s tape marking my sewing machine bed, I just aligned the top of the bag with the far edge of the tape.
- Use a seam ripper to pick out the side seam stitches between the two casing seams. Don’t remove the stitches from the inner bag.
- Cut two pieces of cord or ribbon. (See the proper lengths for each size bag in the supply list above.)
- Tie a knot in one end of the first piece of cord. Attach a safety pin to the knot and close the pin.
- Insert the pin into the opening at the side seam.Work the pin through the casing with your fingers, pulling the cord behind it, until the pin and cord come out the same opening where you started. Knot the ends of the cord or ribbon together.
- Insert the second cord or ribbon at the opening on the other side of the bag, work it through, and knot its two ends together.
- To close the finished bag, hold the two cords at their knotted ends and pull them apart. The bag will close automatically.
You have now created a gift bag that makes any present seem a little more special. Even better, the bag can reused again and again.
Thanks for this tutorial. Imagine my surprise when you used the same fabric that I have in my stash!!
Do I pay anything to watch tutorials?
No, you don’t have to pay, Flora. Everything on our blog is free for you to read and view. Our books are available for sale if you feel inclined to buy them.
I have seen many tutorials describing this method for making lined gift bags, but your tutorial is the best one I’ve seen. Your step by step directions are very clear and understandable. Additionally, your photos are excellent as well. Thank you so much for taking the time to write this tutorial.
I think these bags are a gift in themselves, and much nicer than paper gift bags, plus they are eco-friendly.
Thank you for the compliment, Janet! I make these bags to give as Christmas gifts every year. I make an assortment of small, medium, and large bags in different fabrics and give them to my friends. They get used all year long. I find when I give a present in one of these bags, the recipient often likes the bag as well as the gift inside!
Thank you. I am sure these bags will be a hit with my family! This also give me ideas for using some of the Christmas fabrics that have been lingering for along time.
I’m always happy to spread the love of making gift bags. You get to sew some gorgeous fabrics and feel eco-responsible, too.